Setting up on PS5
You can't directly set up a VPN on your PS5, but you can set up a VPN on your iOS/iPadOS or Android phone and connect your PS5 to it.
In this guide, we will use an iOS device as an example.
- ClashX Pro (macOS)
- v2rayNG (Android)
- Stash (iOS/iPadOS)
- Clash For Windows (Windows)
Devices must be within the same Wi-Fi network!
Setting up a VPN on iOS/iPadOS
To be able to share VPN over Wi-Fi, you must have the Shadowrocket application installed and configured.
Step 1
Open Shadowrocket, select the server/country to connect to and enable VPN.

Step 2
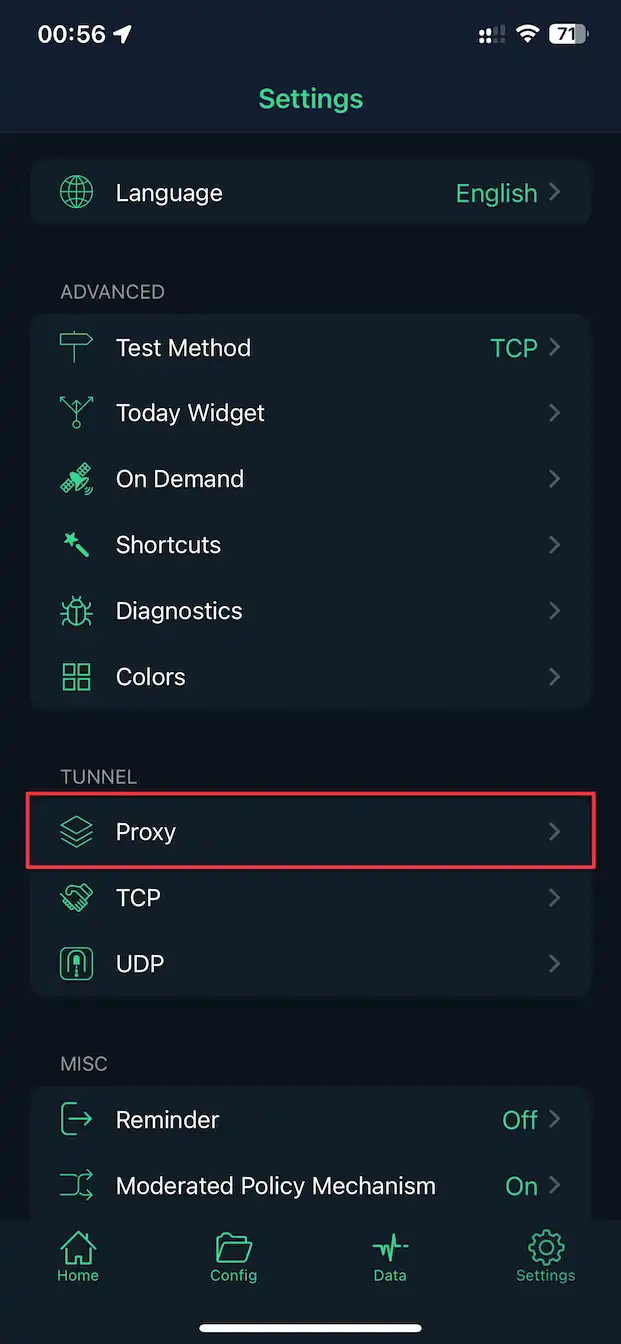
Go to the Settings section and click on the Proxy item.
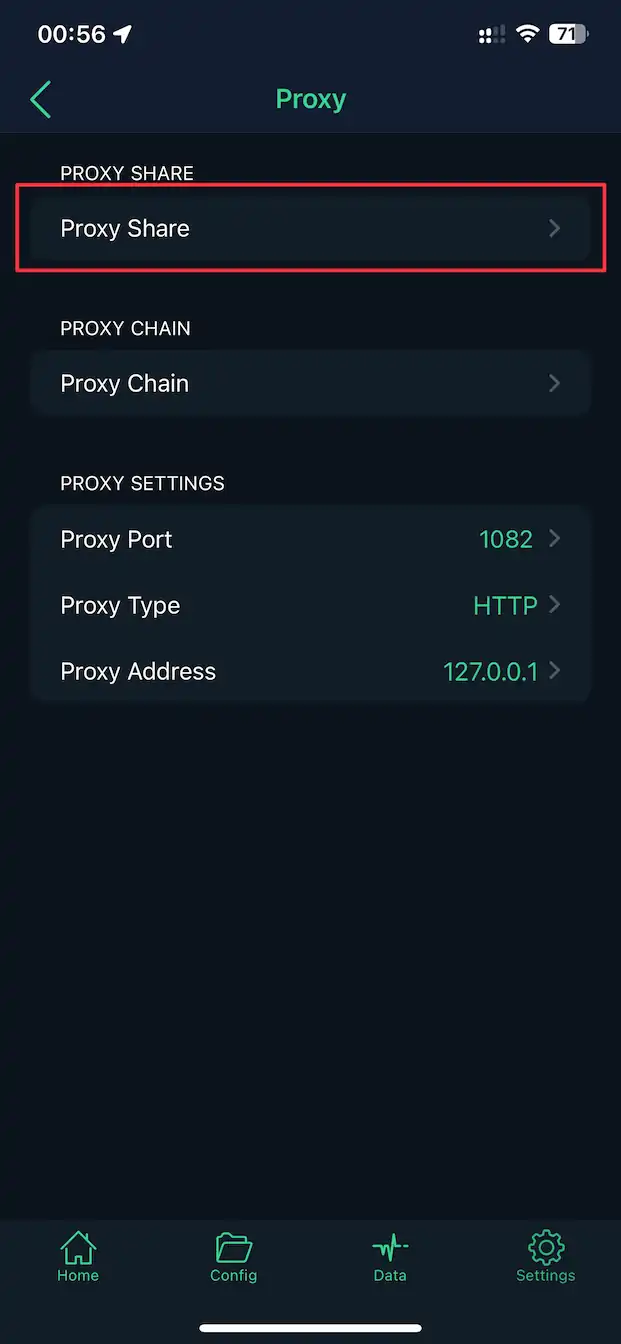
In the section that opens, select Proxy share.
Step 3
Be sure to enable the Enable share item.
Just below you see two parameters - IP and Port.
Remember them or save them, they will be useful to us later.

Setting up on PS5
Step 1
Go to the Settings section and select Network.

Step 2
In the Network section, select Settings on the left.

Step 3
In the section that opens, select 'Establish an Internet connection'.

Step 4
At the very top, select your current network that your PS5 is connected to.
Press the Options button on the gamepad (top right of the touchpad. Three stripes are drawn above this button.)
In the pop-up window that opens, select Advanced settings.

Step 5
In the section that opens, select Proxy server and click Use.

Step 6
Address- enterIPfrom theShadowrocketapplication.Port number- enterPortfrom theShadowrocketapplication.- Save the changes by clicking on the
OKbutton on the right.

After saving all changes, be sure to reboot your PS5.